Last updated 3/2022
MP4 | Video: h264, 1280×720 | Audio: AAC, 44.1 KHz
Language: English | Size: 9.66 GB | Duration: 14h 27m
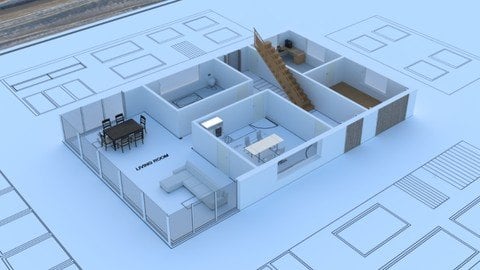
Design & Create Architectural Animations in Blender – 3D Graphics in Blender – Full project – 3D Modeling in Blender
What you’ll learn
Create the house construction animation and render a final video
Draft Accurate 2D Designs in CAD Software
3D Model the layouts into a fully realised 3D House ready for animation
How to work Fast & Efficiently inside the Free Software Blender & FreeCAD
How to Light your scene with Environment textures to achieve real world lighting conditions
Use the Archimesh add-on to quickly create architectural elements inside Blender
Requirements
Computer capable of running Blender 3x or above
You should be able to use a PC at beginner level
Description
Welcome to the course Architectural Design and Animation in blender 3.In this course you will learn to create a modern house construction animation in the free and open source software Blender & FreeCAD. Learn to Draft the house plans in free CAD software before 3D modelling a fully realised house model in Blender. Learn this amazing free software and new skills by getting hands on with detailed instruction.This course will teach you the skills to accurately design the Layouts in CAD software. Then take those design into a fully realised 3D model for animation. By the end of the course you’ll be able to draft designs in CAD and 3D model and create in Blender.The CAD section of the course is designed to help you achieve accurate real world scale while you are learning this powerful design tool. CAD allows for detailed drawings to be created so we can accurately model the house model.This course is designed for practical learning. The videos will take you step by step through the process of design, Modelling, Texturing & Animation. Each step is clearly detailed so beginners to intermediate students can successfully complete the course. With the latest release of Blender there has never been a better time to master the software.This course is project based so each section builds on the previous examples so you are always learning how to work more efficiently in Blender. You will learn everything necessary to complete the project successfully and in your own time.This is a unique skill especially for Architectural Designers, 3D artists or beginners looking to create their own unique architectural models.Some of the Course Highlights:Creation of 2D layoutsGeometry NodesHow to convert Ngons to Quad topology.Asset Library3D Modelling & Texturing the AssetsCreation of trees, rocks & grassSet up the scene & LightingCreate the plans rolling openSetup the animation with camera & key framesRendering with the new Real time render engine EeveeVideo format in Blender’s video sequence editorAnimation & RenderingLearn how to design in this amazingly powerful 3D production suite and start designing architectural 3D models, design for 3D games, design unique 3D assets, design for 3D printed objects, or create amazing art work.Architectural visualization in Blender will allow you to impress your clients with photo realistic animations and images of their proposed designs.Unleash your Creative sideOpen Blender and be amazed at the possibilities. Discover a new world of creativity. Blender is free, and constantly improving to deliver industry standard tools. It has a strong online community just waiting to be discovered.More industries than ever are starting to use Blender with more and more small production houses releasing work created using this amazing and user focused software. This will increase greatly overSo jump in and start creating today!
Overview
Section 1: Introduction
Lecture 1 Introduction
Section 2: Drafting & Design
Lecture 2 Where to get the free & Open Source Software FreeCAD
Lecture 3 Setting up the FreeCAD Interface
Lecture 4 An Introduction to the Interface Part 01
Lecture 5 An Introduction to the Interface Part 02
Lecture 6 An introduction to the Snap menu
Lecture 7 Drafting the layouts part 1
Lecture 8 Drafting the layouts part 2
Lecture 9 Drafting the layouts part 3
Lecture 10 Drafting the layouts part 4
Lecture 11 Drafting the Windows part 1
Lecture 12 Drafting the Windows part 2
Lecture 13 Drafting the Doors part 1
Lecture 14 Drafting the Doors part 2
Lecture 15 Changing the Line styles and Thickness
Lecture 16 Adding the stairs detail
Lecture 17 Setting up the ODA File Convertor
Lecture 18 Importing Furniture Assets
Lecture 19 Adding Dimensions in FreeCAD
Lecture 20 Adding Text to the Layouts
Lecture 21 Creating Layouts in FreeCAD
Lecture 22 Exporting DXF File From FreeCAD
Section 3: Introduction to Blender
Lecture 23 Where to get the free and Open Source Software Blender
Lecture 24 Customising the Interface for easier control
Lecture 25 How to Enable Add-ons
Lecture 26 How to Recover Files After Crashes
Lecture 27 Shortcut Key Guide
Lecture 28 How to Navigate the Blender interface
Lecture 29 Introduction to the 3D View Part 1
Lecture 30 Introduction to the 3D View Part 2
Lecture 31 Introduction to the 3D View Part 3
Lecture 32 Introduction to the Tool Shelf Part 1
Lecture 33 Introduction to the Tool Shelf Part 2
Lecture 34 Introduction to the Tool Shelf Part 3
Lecture 35 Introduction to the Tool Shelf Part 4
Lecture 36 Introduction to the Tool Shelf Part 5
Lecture 37 Layout_Tabs_Editors_And_Splitting_Screens
Lecture 38 Introduction to Collections
Lecture 39 Introduction to the 3D Cursor
Lecture 40 Introduction to Snapping
Lecture 41 Face Orientation & the Direction of Normals
Lecture 42 An Introduction to Coordinates
Lecture 43 An Introduction to the Asset Browser
Section 4: House Construction
Lecture 44 Setting Up the Unit Scale
Lecture 45 Importing the DXF File From FreeCAD into Blender
Lecture 46 Positioning the DXF Objects
Lecture 47 Introduction to Archimesh
Lecture 48 Adding External Walls Using Archimesh
Lecture 49 How to add External Doors with Archimesh
Lecture 50 Adding Internal Walls with Archimesh
Lecture 51 Adding Internal Doors on the Ground Floor
Lecture 52 Adding Windows Using Archimesh
Lecture 53 Adding Large Windows Group using Archimesh
Lecture 54 Modelling The First Floor
Lecture 55 Modelling the First Floor Balcony
Lecture 56 Adding Internal Doors on the First Floor
Lecture 57 Adding Windows using Archimesh
Lecture 58 Using Archimesh to Create a Stairs
Lecture 59 Creating a ceiling for the ground floor
Lecture 60 Creating Floors to the Model
Lecture 61 Ground Floor and Base
Lecture 62 Modelling the roof and Base
Lecture 63 Using Archimesh to Add Railings to the Balcony area
Lecture 64 3D Modelling the Front Step
Lecture 65 3D Modelling the External Walls
Lecture 66 3D Modelling the patio and Grass Area
Section 5: Lighting & Materials
Lecture 67 Adding Lighting Elements to the Scene
Lecture 68 Where to get texture maps
Lecture 69 UV Unwrapping and Texturing Floor
Lecture 70 Creating the External wall Material
Lecture 71 Preparing the First Floor Mesh
Lecture 72 Creating Sill Material
Lecture 73 Creating Door Material
Lecture 74 Creating External Wall & Paving
Lecture 75 Ground Plane Material
Lecture 76 Creating Stone Particles
Lecture 77 Creating Grass Particles Part 1
Lecture 78 Creating a tree using the Sapling add-on
Lecture 79 Creating a tree using the Sapling add-on
Lecture 80 Creating the Tree Material
Section 6: Creating the House Construction Animation
Lecture 81 Combining Objects
Lecture 82 Final Checks
Lecture 83 Adding the Table and Plan Textures
Lecture 84 Roll the plan open
Lecture 85 Setting up the Boolean Modifier
Lecture 86 Setting up the Camera
Lecture 87 Adding the Remaining Booleans
Lecture 88 Setting up the Animation Part 01
Lecture 89 Setting up the Animation Part 02
Lecture 90 Setting up the Animation Part 03
Lecture 91 Setting up the Animation Part 04
Lecture 92 Rendering the Animation
Lecture 93 Combining the Animation in the Video Editor
Lecture 94 Combining the Animation in the Video Editor
Section 7: Drafting & Design – 2.8 Content
Lecture 95 Getting the free & open source parametric modeler
Lecture 96 Creating construction lines in FreeCAD Part 1
Lecture 97 Creating construction lines in FreeCAD Part 2
Lecture 98 Creating construction lines in FreeCAD Part 3
Lecture 99 Creating walls and window lines in FreeCAD part 1
Lecture 100 Creating walls and window lines in FreeCAD part 2
Lecture 101 Creating doorway lines in FreeCAD
Lecture 102 Creating line styles in FreeCAD
Lecture 103 Creating stairs lines in FreeCAD
Lecture 104 The ODA file converter available for FreeCAD
Lecture 105 Adding CAD Blocks to the layouts in FreeCAD
Lecture 106 Adding Dimensions to the layouts in FreeCAD
Lecture 107 Adding text to the layouts in FreeCAD
Lecture 108 Creating layouts in FreeCAD
Lecture 109 Exporting the DXF file we created from FreeCAD
Section 8: Introduction to Blender – 2.8 Content
Lecture 110 Getting Blender
Lecture 111 Setting up the interface and enabling add-ons in Blender
Lecture 112 An introduction to navigation in Blender
Lecture 113 An introduction to the 3D view
Lecture 114 An introduction to the tool shelf
Lecture 115 An introduction to collections
Lecture 116 An introduction to the 3D cursor and the multiple use cases
Lecture 117 An introduction to snapping in Blender
Section 9: Layout Creation in Blender – 2.8 Content
Lecture 118 Creating a landscape and examining two methods of generating the mesh
Lecture 119 Marking out the site position
Lecture 120 Importing the DXF file into the scene, converting and scaling to correct size
Lecture 121 Positioning the DXF imports in the scene
Lecture 122 Adding the external wall positions to the layouts
Lecture 123 Adding the internal wall positions to the layouts
Lecture 124 Adding the door positions to the layouts
Lecture 125 Adding the door open direction to the layouts
Lecture 126 Adding the window positions to the layouts
Lecture 127 Adding Dimensions to the layouts using MeasureIt
Lecture 128 Adding text to the layouts using MeasureIt
Lecture 129 Adding material to the layouts and enabling Freestyle to create the hard line re
Lecture 130 Rendering the layouts in Blender and combing with dimensions in the compositor
Section 10: House Construction – 2.8 Content
Lecture 131 Setting up Archipack with material library and thumbnail images
Lecture 132 Using Archipack to create external doors
Lecture 133 Using Archipack to create internal walls
Lecture 134 Using Archipack to create doors on the ground floor
Lecture 135 Using Archipack to create windows on the ground floor
Lecture 136 Using Archipack to create large windows
Lecture 137 3D Modelling the first floor
Lecture 138 3D Modelling the balcony area
Lecture 139 Using Archipack to create doors on the first floor
Lecture 140 Using Archipack to create windows on the first floor
Lecture 141 Using Archipack to create a stairs
Lecture 142 Organizing the collections in the Outliner
Lecture 143 Using Archipack to create ceilings for each room on the ground floor
Lecture 144 3D Modelling the floor to accommodate the stairs
Lecture 145 Using Archipack to create floors for each room of the house
Lecture 146 Tidy up the floors issues and organize the Outliner
Lecture 147 3D Modelling the roof
Lecture 148 Using Archipack to create railings for the balcony area
Lecture 149 3D Modelling the concrete base
Section 11: Lighting & Materials – 2.8 Content
Lecture 150 Adding lighting elements to the scene
Lecture 151 Creating floor material using texture maps
Lecture 152 Setting up a render camera to preview the material
Lecture 153 Creating window material using texture maps
Lecture 154 Creating railing material using texture maps
Lecture 155 Creating door material using texture maps
Lecture 156 Creating an external render material for the external walls of the house
Lecture 157 3D modelling the external environment
Lecture 158 Creating stone tile material for the external paving area
Lecture 159 Creating stones and using the particle system to disperse in the scene
Lecture 160 Creating grass and using the particle system to disperse in the scene
Lecture 161 Creating trees with the sapling add-on
Lecture 162 Creating tree texture images to add back into the scene
Lecture 163 Setting up the camera and arranging the scene
Lecture 164 Updating the House external plaster with texture maps
Lecture 165 Rendering out an image using the Eevee render settings
Section 12: Creating the House Construction Animation – 2.8 Content
Lecture 166 Combing each set of objects and preparing for the animation part 1
Lecture 167 Combing each set of objects and preparing for the animation part 2
Lecture 168 Using the boolean modifier to setup for the house reveal
Lecture 169 Creating the table and plans with textures for the material
Lecture 170 Using the curve modifier to create the plans rolling open on the table
Lecture 171 Setting up the Camera to capture the Animation
Lecture 172 Setting Key frames and creating the animation
Lecture 173 Rendering the animation and combining them in Blender’s VSE to Create a Video
Section 13: Bonus Section
Lecture 174 Bonus Lectures
Students Who Want To Be Capable Of Adding Animation To Architectural Visualization Projects,Students Who Want To Learn A Free Design Package For Their Own Professional Use,Designers And 3d Visualization Students,Beginners Who Want To Design & 3D Model Successfully,Students Who Want To Create Unique 3d Models,Designers Who Need To Iterate Quickly And See Their Ideas In Physical Form,Architects Who Need Accurate Designs & Models,Blender Users Who Want to Learn Quickly
Password/解压密码www.tbtos.com
转载请注明:0daytown » Architectural Design & Animation In Blender 3X